Note: Medtronic Inc. is not responsible for the support or updates to the Fluke SigmaPace 1000. Medtronic supports the 5392 and this procedure is written to support Medtronic Customers in the use of testing with the Fluke SigmaPace 1000. Medtronic does not specifically recommend or promote the use of any one specific transvenous temporary pacemaker analyzer for the purpose of testing Medtronic EPG’s.
5392 Service Life
Medtronic will no longer service or calibrate EPGs that are more than 7 years old. EPGs that are equal to or less than 7 years old can be serviced and calibrated. Medtronic recommends that the 5392have the calibration verified at minimum once every 12 months. When the 5392reaches end of Medtronic Service Life, the 5392can continue to be used, based on the physical condition and continued scheduled preventive maintenance checks (refer to the 5392 Technical Manual). The scheduled preventive maintenance checks would have to be completed using a transvenous temporary pacemaker analyzer. The testing would verify the functions as stated within the 5392 Checkout Manual and the test results to be found within the stated tolerances of5392Checkout Manual. Contact Medtronic Instrument Technical Services, 1 (800) 638-1991 with questions regarding testing and functionality.
Introduction:
The Fluke SigmaPace 1000 is a menu-driven analyzer designed to facilitate testing of external transvenous pacemakers such as the Medtronic Model 5392 Dual Chamber Temporary Pacemaker. Many of the tests are automated to the extent that, once a test is initiated, no operator intervention is required; the analyzer performs those actions required to produce a test result.
The following Medtronic 5392 tests are a compilation of the tests specified in the 5392 Checkout Manual and Technical Manual. Although operation of the tester is quite intuitive, the instructions are provided in a step-by-step format for the benefit of the new user. Instructions in bold describe the desired test and/or result; indented instructions in italics provide a keystroke-by-keystroke “how-to” guide to each test.
For detailed operation and function of the 5392 refer to the Technical Manual or Checkout Manual. The 5392 can provide additional “Optional Test” that could be performed on the temporary pacer.
1. CHECK BATTERY.
- Always test a pacemaker using, two “fresh” IEC type LR6-sized (AA-sized) 1.5 V alkaline batteries (Duracell MN1500, Eveready E91 or equivalent).
- Turn on the pacemaker and observe completion of the self-test, after which the device default settings will appear.
Default settings when 5392 is powered “ON” are:
Upper Display Screen: Figure A
Rate = 80 bpm
A output = 10mA
V Output = 10 mA
Mode: DDD
Lower Display Screen: (Press the (Enter key) on 5392 to display), Figure B
A Sensitivity = 0.5 mV
V Sensitivity = 2.0 mV
A – V Interval = 170 ms
Upper Rate = 110 ppm
PVARP = 300ms
Atrial Tracking = ON
Settings: Automatic
NOTE: After the power up self-test function is completed a “MODE Selection” screen is displayed, Figure B. This screen can be changed to “Parameters Menu” by pressing , or the screen will revert to “Parameter Menu” after 30 seconds with no User interaction.
Also, the Lower Display will go blank after 1 minute if there is no User interaction.
See page 9, of these instructions.
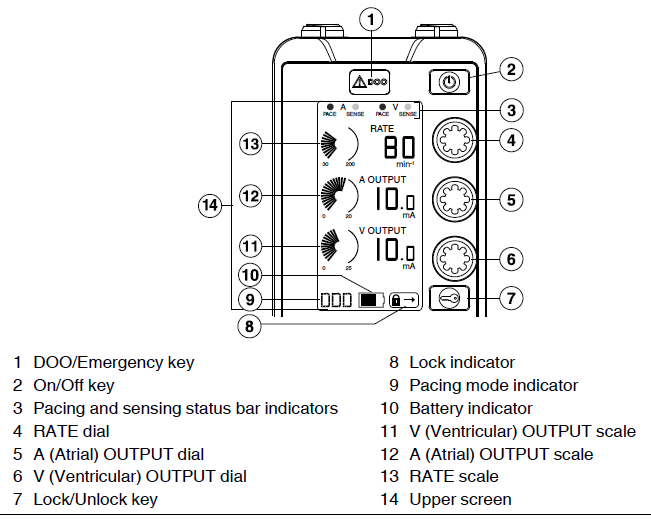
Figure 1
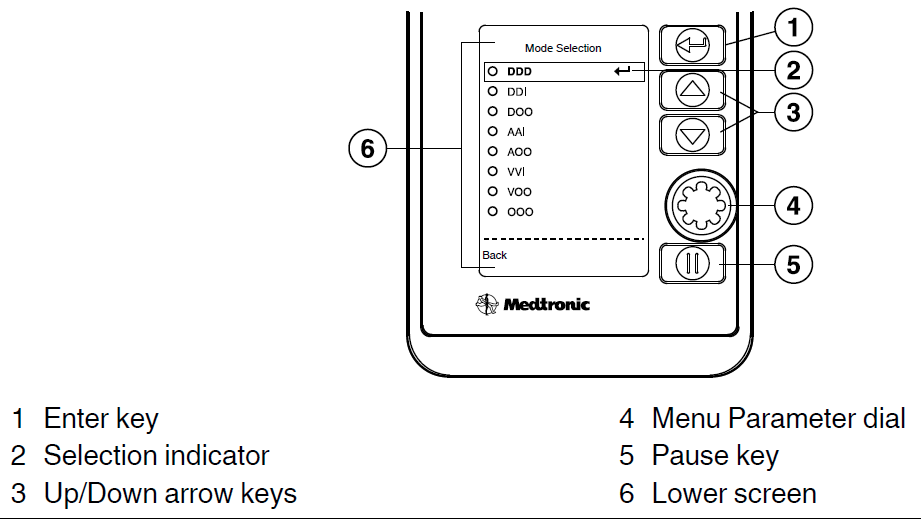
Figure 2
Set up for the Sigma 1000 and 5392:
DEMAND MODE: Verify operation as a “demand” pacemaker, i.e. pacing is inhibited in the presence of a “native” ECG signal. Both channels are tested simultaneously.
- On power-up, the 5392 pacemaker will default to “DDD” pacing mode.
- Verify the default setting of the 5392 pacer for a Rate of 80 and both Atrial and Ventricular outputs at 10 mA.
- Connect the Fluke SigmaPace 1000 to the 5392 pacer using the leads supplied with the Analyzer, connected to the 5433A and 5433V Patient Cables.
- Depress the Yellow “ENT/POWER ON” button on the SIGMAPACE analyzer.
- Depress “F2” (INV) to select the “Invasive” category. Figure 1
- Depress “F1” (NEXT) to accept a 500 Ohm load for both A and V tests. Figure 2
- Depress “F1” (Pulse Output). Figure 3
- Depress “F3” (DUAL A & V) to test both channels simultaneously.
- Depress “F1” (test will start automatically).
- The analyzer will perform a brief calculation, and then it will begin to display the pacer’s (5392) RATE along with values for “Amp”(Output), ”Rate”(beats per minute), “Width” (Pulse width), “AV Int” (AV Interval), note there is a column for the A (Atrial) and a column for V (Ventricle), channels . Figure 4.
Figure 1
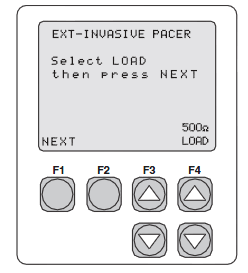
Figure 2
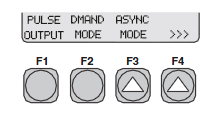
Figure 3
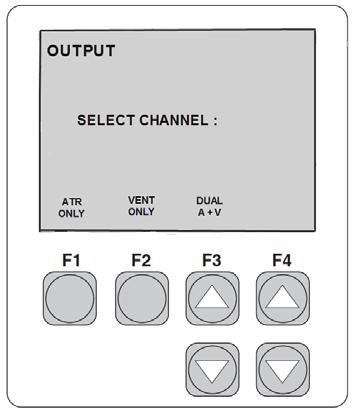
Figure 4
