
Worried about accessing documents you need for an audit?
Keeping a record of the services you’ve done is critical for successful audits and for tracking the health of equipment over time. By automatically generating a report when you conclude a test, your library of test reports becomes effortless to maintain and access.
This tutorial will walk through the process for configuring Fluke Biomedical OneQA to automatically generate readable PDF reports and detailed JSON files whenever you or your team executes a test procedure.
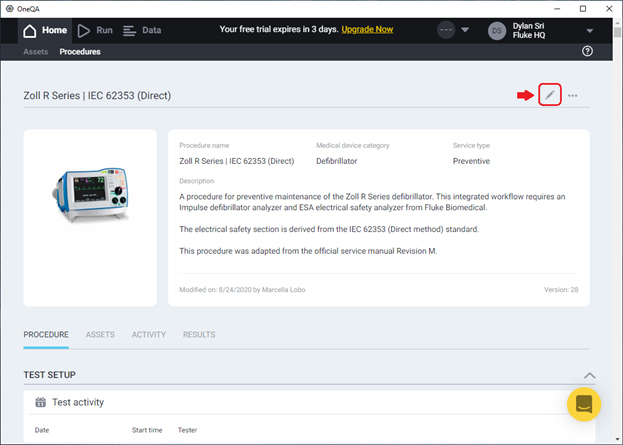
First, select which procedure you want to generate reports automatically, and click Edit.'
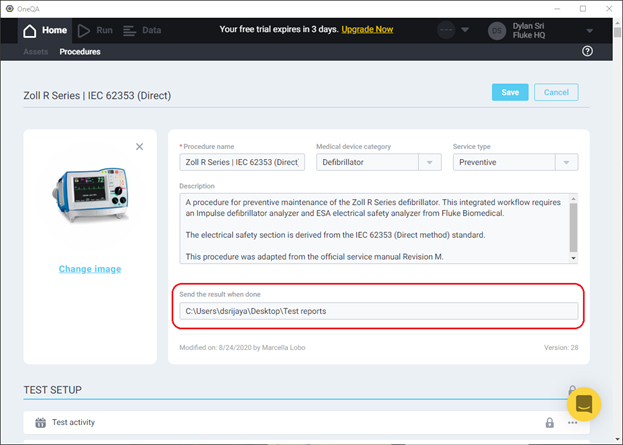
In the Callback field, Enter the local or network-accessible directory where you will want the result files to be placed. Here, I’ve chosen C:\Users\dsrijaya\Desktop\Test reports. If you intend to collaborate with others testing with this same procedure, be sure to set the path to something common to all team members involved. Then save your changes.
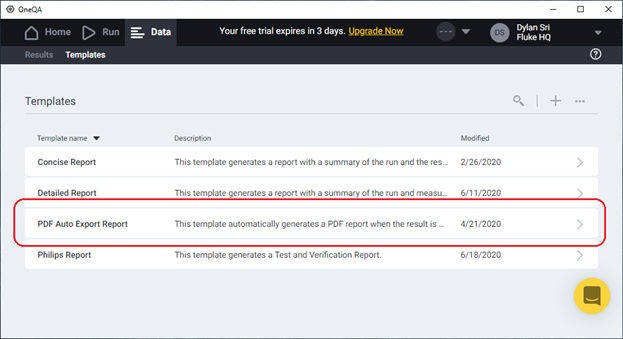
Before proceeding to run a procedure, verify that a Report Template titled PDF Auto Export Report exists. The automatically-generated reports will export through the template with this exact title. By default, the contents of this template are identical to the one titled Detailed Report, but can be modified as desired.
After verifying that the template is all good, you may proceed to perform tests as normal with the procedure you just configured.

When you or your teammate clicks Done to conclude a test, two files will be generated and placed within the Callback directory specified for that procedure: a readable PDF report and a detailed JSON file.
The PDF file is formatted according to the design of the PDF Auto Export Report template, and is useful for quickly reviewing details of the testing performed, or sharing with a supervisor or auditor if requested.
For more details on this, please take a look at the knowledge base article about Integrating with OneQA.
That’s all there is to it. After configuring a procedure once, you can forget about the laborious task of writing your own reports and can focus instead on maintaining the equipment in front of you. Just remember that each procedure must be configured separately!
Good luck!
Read more about OneQA:
How to add your logo on your test report
Start a free trial of OneQA today